

How to Make Custom Dog Magnets
Making custom dog magnets in minutes has been on my “to do” list for a long time. I love refrigerator magnets and also I put them on the large metal filing cabinet in my office. Dog magnets also make cute just because, thank you, or holiday gifts to friends and family.
For full transparency, I must say I am not the craftiest dog mom on the planet. This custom dog magnet craft, thankfully, is super easy, doesn’t cost a lot of money, and the finished product looks like something purchased from a cute dog boutique.
Custom Dog Magnets Materials You Will Need
- A good pair of cutting scissors
- Small paint brush
- Adhesive magnet sheet(s)
- Decorative scrapbook paper with your favorite design(s)
- Mod Podge
- Scotch tape
PS I link out to all these supplies at the bottom of this post.
That’s it…not bad, right? You can do all of this for well under $20 bucks.
Some of the links in this article are affiliate links. As an Amazon Associate, I earn from qualifying purchases. I am also an Etsy and Chewy affiliate.
Step by Step Instructions
(1) Step One: Get all the supplies you need. Choose some decorative paper you would like to use for this project. Insider’s tip: The heavier stock paper doesn’t curl due to its weight. We picked out some fun, heavier glitter sheen craft paper that matched this blog’s colors, along with about a dozen other patterns, since we did this as a group craft with dog-loving family and friends.
You don’t need a lot of paper; it all depends on how many you want to make. These make cute thank you’s in cards for the vet, groomer, dog sitter, so consider that and make a batch. We found the heavier scrapbook paper to work the best, but choose whatever your heart desires.
Pick up some magnetic adhesive paper. It works great because one side is sticky and the other is magnetic. You can buy the pre-cut squares or a sheet of them, like I did, so you can customize a variety of sizes. It’s your choice. Local craft stores may have cheaper rolls of magnetic adhesive sheets, but I usually shop on Amazon.
(2) Step Two: Get the dog breed silhouettes you plan to use. For me, I used Cocker Spaniel and I Googled ‘American Cocker Spaniel silhouette’ and then clicked on the Image option, as indicated in this screen shot below. As long as you do not plan to sell the silhouettes or the magnets you make from them, you will be fine. If you plan to sell these dog magnets, you need to obtain the copyright to sell.

You’ll have to do some searching for your favorite breed silhouette, or if you have a mixed breed, you can search for that. Pick the size you want for your dog breed magnet. I made a few different sizes and really liked the 4 x 6 inch version. It was a nice size for the fridge and fits perfectly in a standard snail mail card as a surprise to the recipient. Print as many copies as you want.
Save ink by setting the printer to low ink, since you only need this silhouette for the outline to cut. You are welcome to right-click the image below and print it, should you decide to make a Cocker Spaniel custom dog magnet. I ended up printing about 15 copies since this was a group project.

(3) Step Three: Before you begin, cover the work space you plan to use with newspaper and/or a craft mat. Since I plan to craft other things, I purchased a craft mat. You don’t need this, but I invested a few bucks so I’d have it for future dog craft projects. Plus, the craft mats are available in different sizes.
(4) Step Four: Cut out your dog breed silhouette, getting as close to the edges as possible. It will end up looking something like this after you cut it:

(5) Step Five: Take two to three pieces of scotch tape and put them on your palm. The tape size depends on how big your magnet is. You place them on your palm and rub it a bit so that the tape isn’t super sticky on the back of your black silhouette you just cut out. Make little double back tape loops and stick those pieces to the back of your cutout silhouette, like this:

(6) Step Six: Position and stick your cutout silhouette onto your paper of choice. Then cut or place the appropriate sized magnet adhesive material underneath that so that it is layered and appears something like this: (remember, the magnetic side is down so that the silhouette is placed onto the craft paper and then onto the white part of the magnetic paper)

(7) Step Seven: Remove the film from the back of your adhesive magnetic paper and carefully stick your craft paper with the silhouette attached to it. Please go slow and do this carefully because if you mess up, you may have to start over. Just go slow, line it all up, and take your time. Once you have it stuck to the magnetic sheet, you simply cut around the silhouette. Prior to cutting, here’s what your silhouette should like: (and here are my favorite craft scissors).

When you finish cutting the silhouette and magnet with paper attached, you will have something like this left:

(8) Step Eight: Time to Modge Podge it! Prior to using Modge Podge, which is a water-based sealant and finish, here is what your DIY dog should resemble this:

You are almost done!!!
Step Nine: Set the finished product somewhere safe and free of dog hair to dry that is magnetic if possible. If you set it on a non-magnetic surface, it is likely to curl around the edges. If this does happen, after it completely dries, you can flatten it with a large book or another heavy object.
Be aware that whatever you dry your magnet on will likely pick up some glue residue, which cleans up easily with cold water. If you have a metal shelf or something similar, this is ideal.

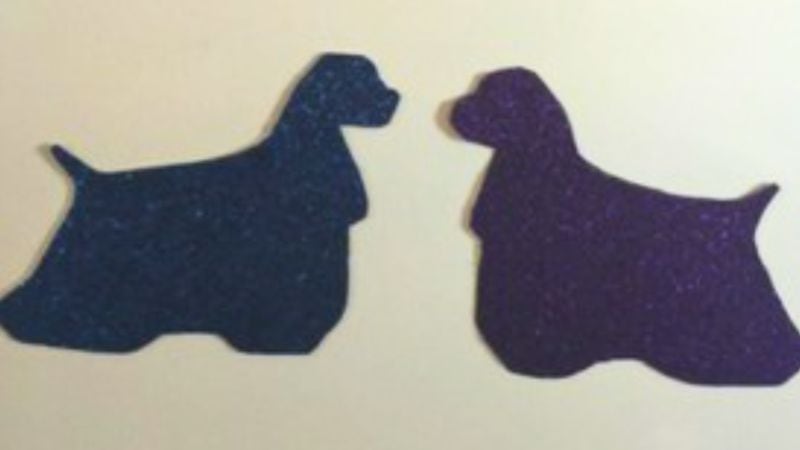
Step Ten: Show it off! Once the magnet completely dries, you can stick it to any magnetic surface you please! If you make this craft, we’d love if you shared a photo of the finished product(s) on our Fidose of Reality Facebook page. Here are two of our finished Cockers for the custom dog magnet project:

BONUS: If you love Cocker Spaniels, stop by and join Club Cocker: Wigglebutts Worldwide on Facebook to engage with other Cocker parents and have fun while learning health and wellness tips for Cockers. You are welcome if you love Cockers, too.
HUGE THANKS to dog mom, Tiffany Rae, for her idea, her instructions, and for sharing her magic with us!
Custom Dog Magnets Materials Shopping List
- A good pair of craft scissors
- Small paint brush
- Adhesive magnet sheet(s)
- Decorative scrapbook paper with your favorite design(s)
- Mod Podge
- Scotch tape
- Craft mat (optional)

Those are really cute – and thank you for mentioning copyright
Nice to see you here. My pleasure, and you are more than welcome. Keeping it all on the up and up. I imagine you can do these with different cat profiles and silhouettes, too, Connie. <3
Great fun, cute dogs. I have a dachshund, but I love Cockers too.